
Here are some tips and tricks we have found throughout out journey. Hopefully they can be helpful to other multiple families! These are not the end all be all answers, but just what we’ve found to be useful so far. Please do your research and consider all the options you find!
Accept help!
While it may seem a little ridiculous to ask visitors to do mundane household chores, it is a huge help. In general people often offer to come help, especially at the beginning, and sometimes the most help is needed not to sit and hold babies, but to get other things done around the house or bring a ready-to-go meal to eat.
Don’t be afraid to splurge a little!

Yes, triplets are expensive. Yes, there are so many necessary things to buy. BUT! Don’t be afraid to splurge a little, because hey, you just had triplets, and there needs to be some enjoyment in it! One thing we are SO thankful we did was a newborn photo shoot. While they can often be a little pricey, we look back and are so glad we did it.
In general, many photographers would love to tackle a triplet shoot without burning a hole in your wallet, since the opportunity doesn’t happen everyday. Ours, done by the amazing Britany at Alaska Photography and Design, turned out better than I ever could have dreamed.
The House
You can make any house or apartment work with multiples. They really don’t take up that much room at the beginning (other than the burp clothes that are everywhere!). We have a 3 bedroom tri-level house. We made one bedroom the nursery with multiple cribs and left the guest bedroom for many future visitors. Two main points about your house:
1. Do basic maintenance work! Have your house checked out for any maintenance needs before babies arrive. For instance, check and service the furnace/boiler and change the furnace filter, change the water filter on your fridge, check your plumbing lines for wear damage, service the washer and dryer, and change the batteries in the smoke alarms and CO2 detectors. The last thing you want is an major issue or a smoke detector to start beeping for battery replacement at 3 o’clock in the morning…
Any repair or service that needs to be completed, do it before they arrive!!! Why?!? Because having the water supply line crack and spray water all over your main floor, wall and kitchen cabinets results in water remediation with loud ass fans in your living room, ripped up flooring and drywall chunks. Did we mention this was two weeks after the girls came home, during our every 3 hour baby feedings cycle (24 hours per day)?! Adventures, indeed. It is all great fun if you are into home remodeling like we (typically) are, but it really throws a wrench in your routine with newborn triplets in the house!
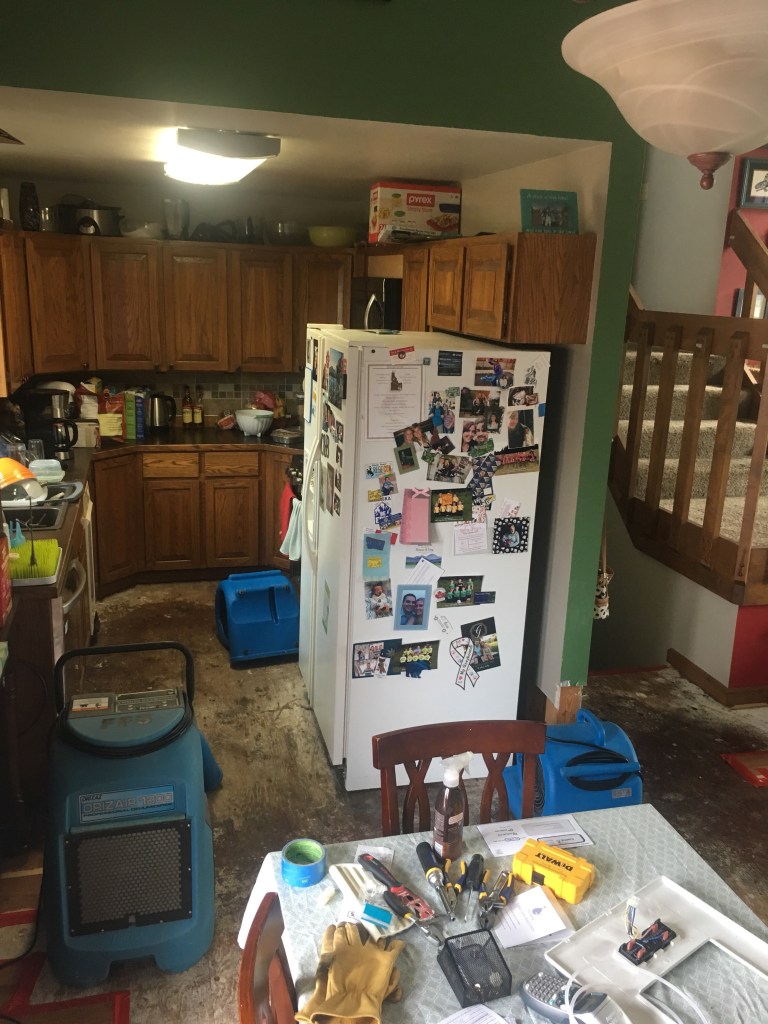
Positive note: our main level received beautiful new flooring AND we didn’t have to install it ourselves! I can tell you Becca was not excited at the idea of installing new flooring after her c-section…
2. Make stations!!! On each level have a crate, tote, or drawer of daily gear. Have diapers, wipes, butt cream, blankets, burp rags, more burp rags and diapers!!! We have an entire drawer of nothing but burp rags and have to refill it all the time. As the girls grow older, the stations continue to expand and change. Now that they are walking, the back deck becomes a new place to play and explore, filled with toys that aren’t inside. It helps keep things interesting for them while breaking up the day. As the kids grow older, toy stations in different places in your house or yard also help with creativity and distraction on the tough, whiny days.
The Car and Car Seats
Finding adequate car seats was a worry and concern the whole pregnancy. We did some heavy research, even busted out the tape measure and measured the car, then went to the baby store and measured car seats.


We have a 2014 Toyota RAV4 and found that we can get the Chico KeyFit30 car seats across the back row of the car. The middle base has to be secured with the seat belt and not the anchor clips on the base.
It is a tight fit, but worked well for the first year! Becca even leaves the house alone with all 3 and goes on adventures.
The Crib
Yeah yeah we know…don’t co-sleep your babies!!! This was often repeated during or NICU stay. Well, we are doing it anyway…kind of.
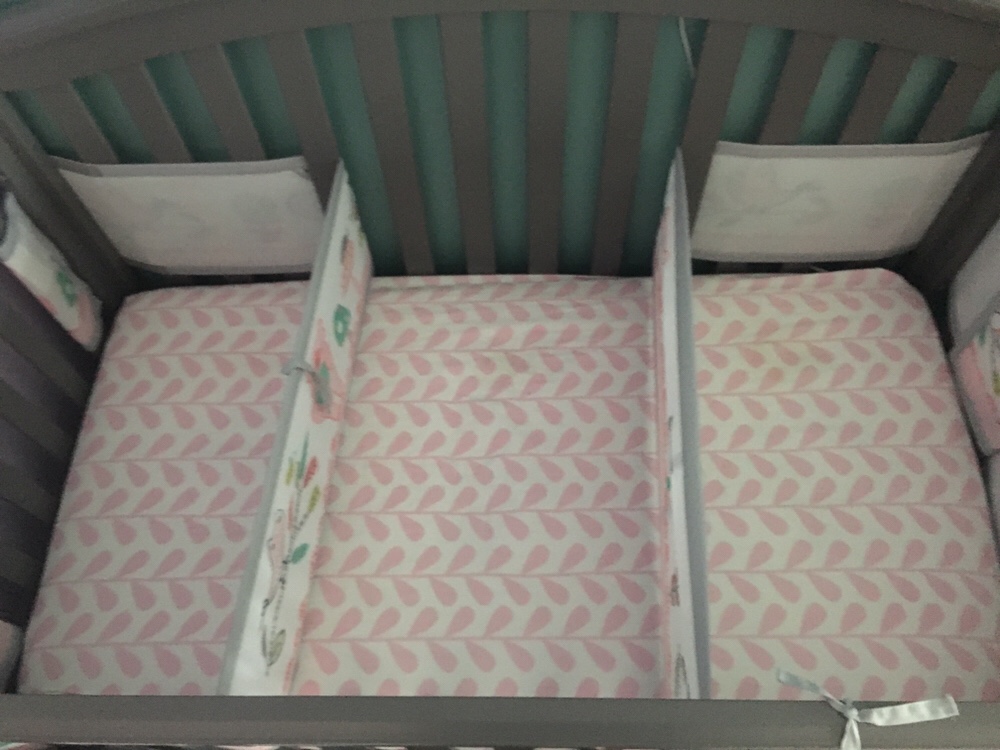
When our babies were tiny, they constantly continued to chat, grunt, and cry for each other all night long. For being so small, they were incredibly loud sleepers. We lasted 4 nights sharing the crib in our room and they were kicked out at 2am! The crib was divided into 3 parts with breathable crib meshing. Once the girls grew larger we used the second crib and had one divided in half. Eventually everyone graduated into their own cribs, all side by side each other in the nursery and once they started interacting with each other more (and not wanting to sleep), we separated the cribs about a foot apart (each) and that helped a ton.
The Time Tracker
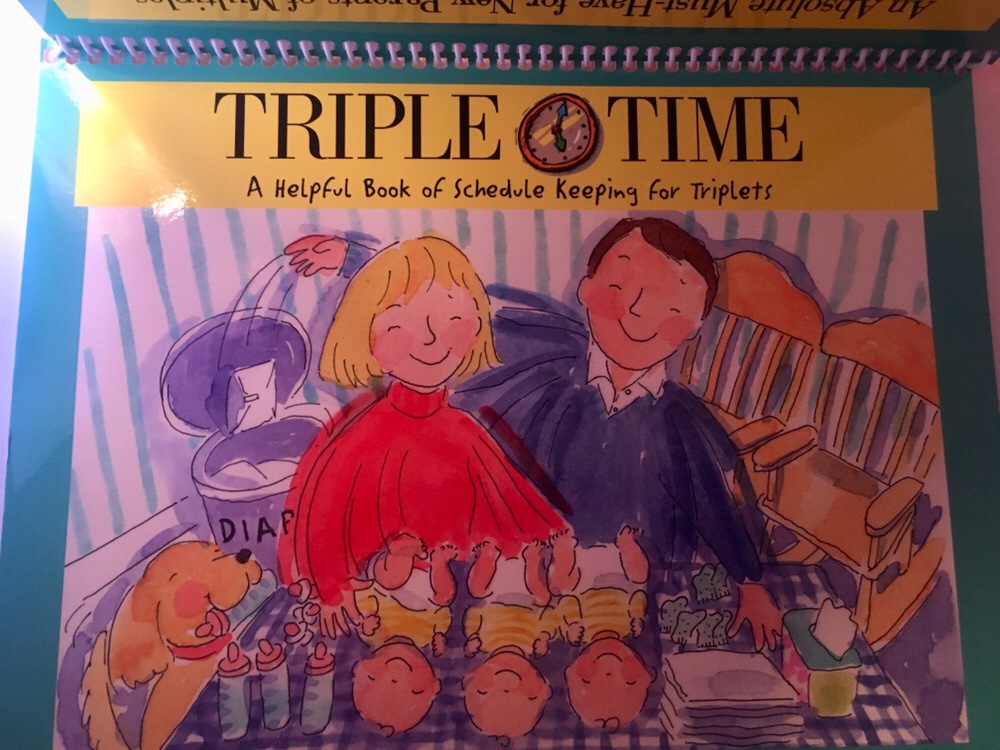
We used the Triple Time tracker and loved it. It is the easiest way to track the ins and outs of the day, and we don’t mean just feeding and diapers! It helps routine stay consistent, reminds you of any issues, and helps you track baths and poops, medicine doses and especially helps during a time when being overly tired is your entire life. This lightens the mental load at least a little during the difficult infancy stage. It is not worth the brain effort of trying to remember who did what everyday; this book is a life saver. You can find it on Amazon.
Triple Time – Triplets Daily Schedule Book https://www.amazon.com/dp/0972467653/ref=cm_sw_r_cp_api_i_wMu9AbGJECVXK
More recently this has book has been sold out on Amazon…so I made my own customized template. Do you need it? Shoot us an email and we’d be happy to send you our own template 🙂
Infant Feedings
We were a pumping and bottle feeding family- it is what worked best for us and the babies. If you had multiples and breastfeed, we salute you! If you are expecting multiples, our two cents is, you do you! Do whatever works for you and the babies, don’t let anyone pressure you into feeding in a manner that doesn’t work with you and your babies.
We went into pumping/breastfeeding with the mentality that if Becca couldn’t produce or it didn’t come in, then it was okay. Formula babies are just as healthy and so many moms have major stress over this! Fortunately, we were able to keep up on milk supply and store more the chest freezer. As the girls grew older, we weaned off of bottles and moved toward more solid foods, while maintaining a good amount in freezer storage. After I stopped producing we used up our frozen supply whenever a runny nose or cold hit and donated the rest.
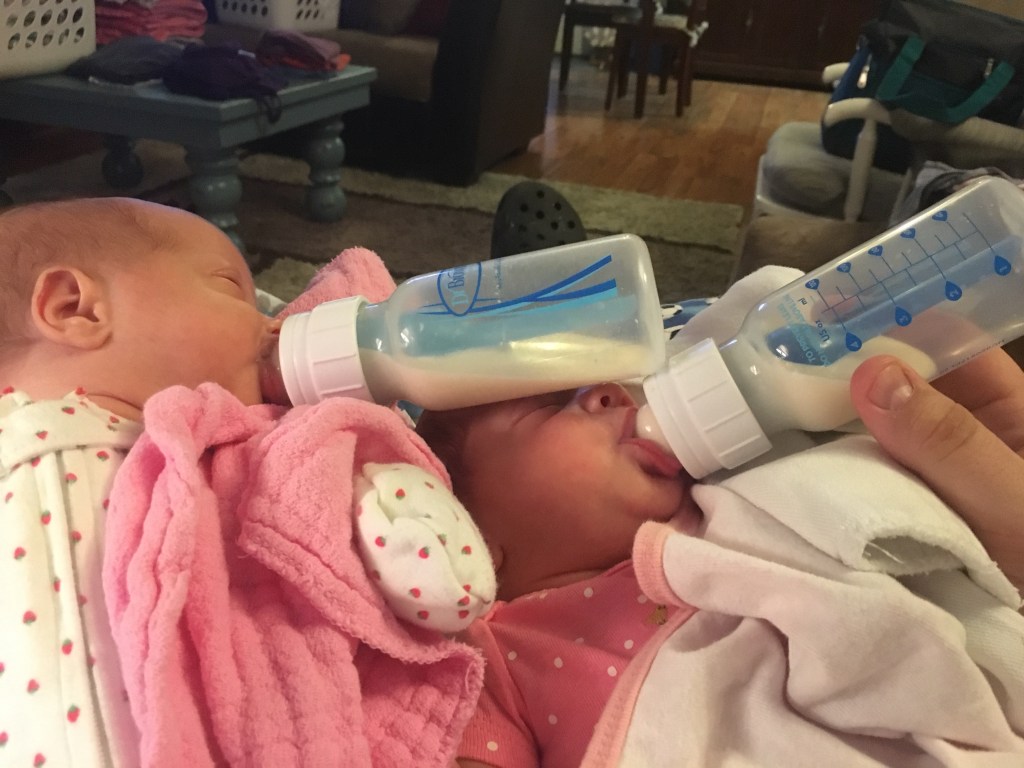
From the NICU, our girls fed in the side laying position until they learned to hold their bottles themselves (huge milestone!). Sidelining can be a challenge because you have to control the flow of the bottle, but is very useful for prop feeding, a method we relied on for a long time. When they were small, we had three main feeding methods:
1.) Triple Propping
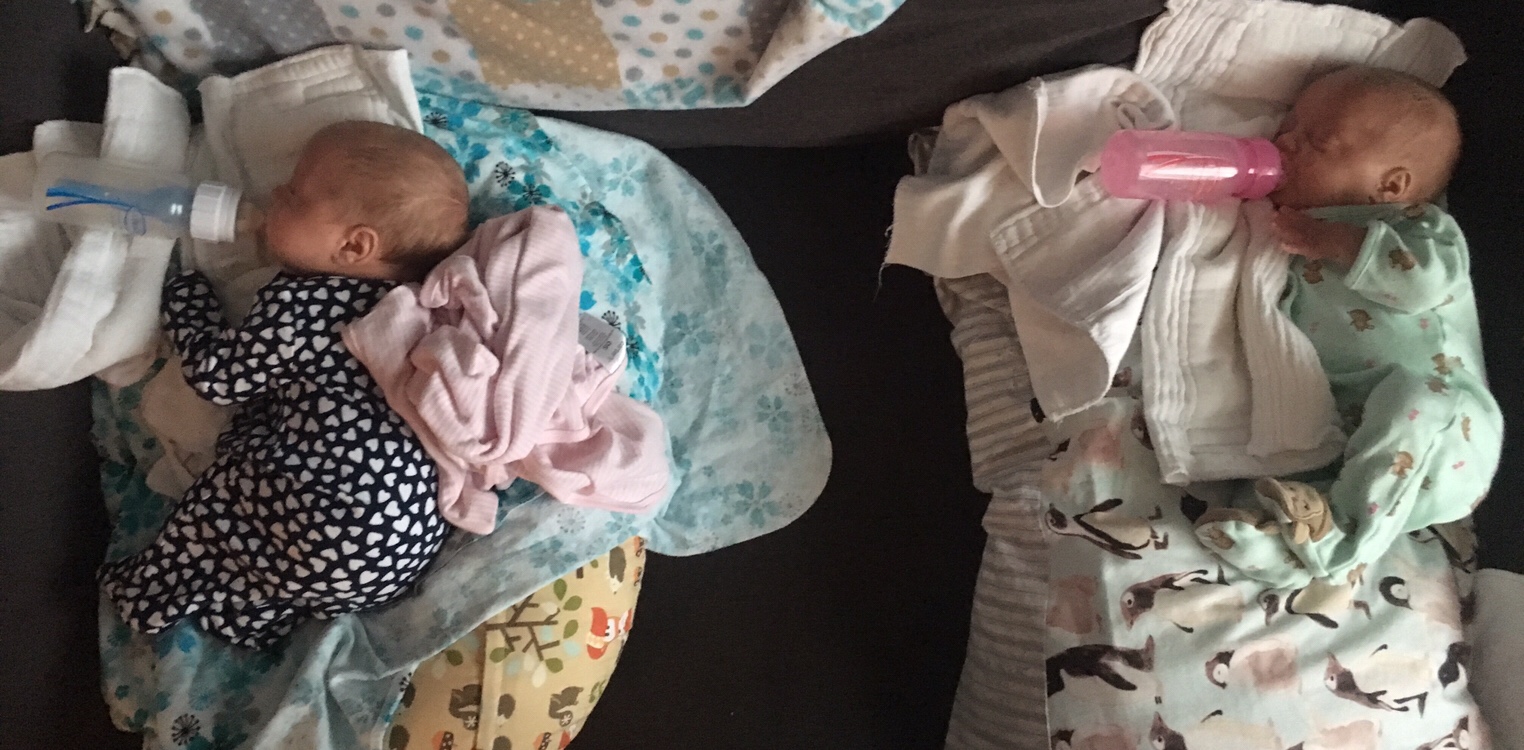
Monitoring the entire time, we laid the babies on their sides and propped the bottle flat so that there’s about half of the flow in the nipple. Propping takes a lot of blankets and burp clothes (or a fancy Amazon ordered tool). It also takes good positioning to keep their latch. We found it best to either put their head against the arm of the sofa or to put a blanket behind their head.
We normally did propping when all were awake and often full of rage and we used this method for many months. It allowed us to feed all three solo if needed, and as time passed feedings became much quicker. Instead of an hour + per feeding, we eventually went down to about 20 minutes. Huge time saver.
I will note that we still have the nursery chair in their bedroom at age three. Dozens of bottle feeds occurred on that chair, which had a high back and arms to confine them safely in the area. That chair was a life saver for feedings, pumping session, snuggle sessions and every thing in between.
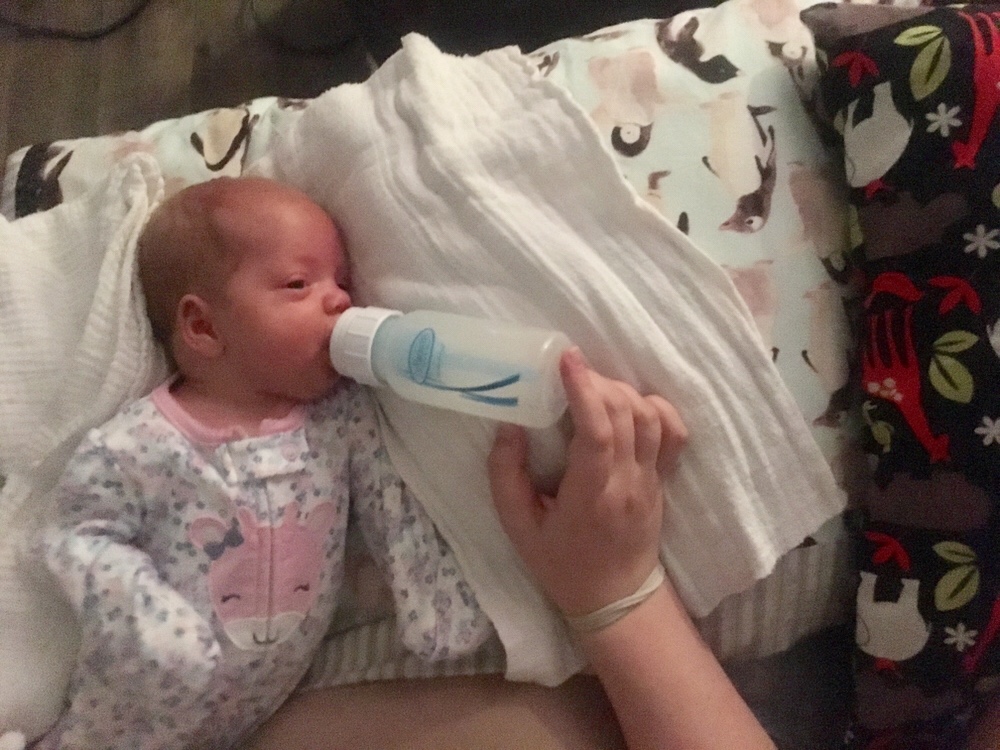
2.) One on one
Each parent feeds a baby while the one that is sleeping or screaming the least gets fed after sisters are fed and burped. This method worked great during friends or family visits too, when everyone could take a baby and feed simultaneously.

3.) Two on one
This one takes more coordination and dexterity, but it does work. Dad found it easiest to have one baby on the left nudged up to the arm of the sofa, and to support the head of the baby on the right with his hand. Then he held the two bottles with his left hand and and used his fingers to adjust the flow. Plenty of burp rags also worked for propping the bottle.
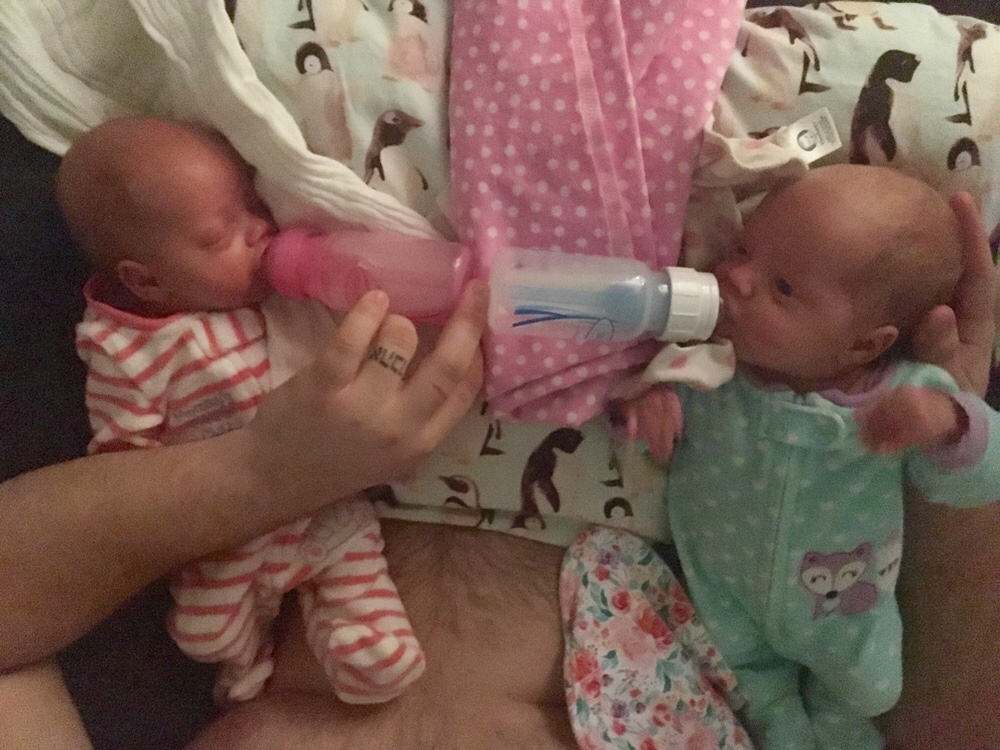
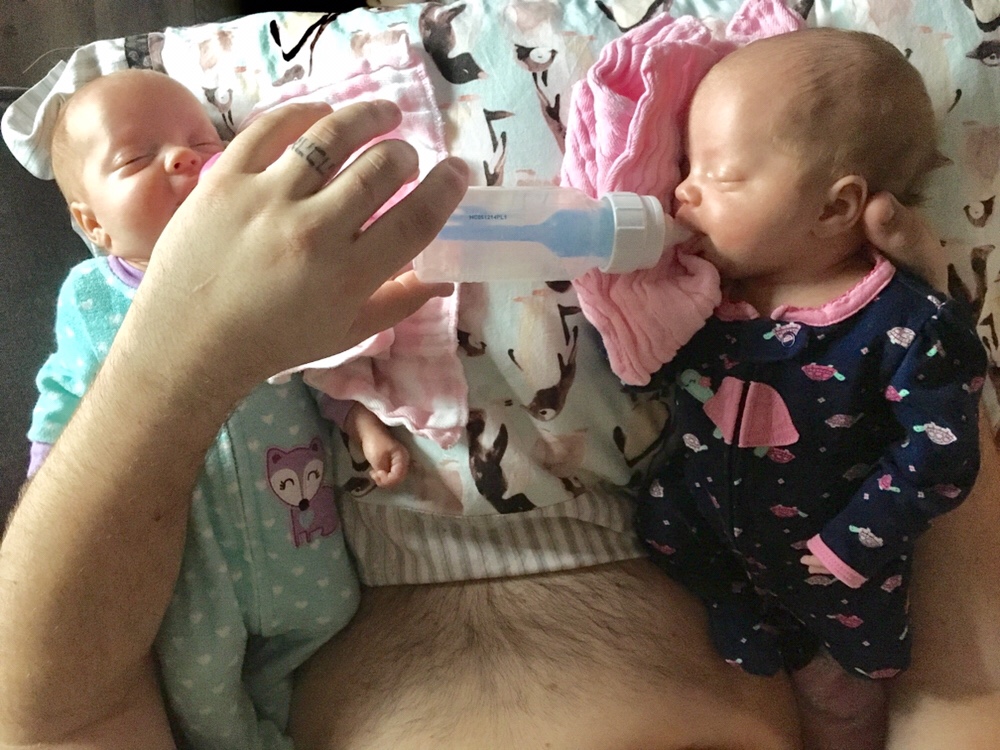
You can also use a baby head to prop… for a second or two… 🙂
For all of our feeding styles during the infant stage, we found that at this period in their development, we were more successful at burping if we lounged them on a pillow or a boppy for a few minutes to let the food settle and then picked them up for burping.
Visitors and Germs
Lastly, don’t be afraid to turn visitors away that have been recently sick (I will note I wrote this prior to COVID-19!)! Preemies are very susceptible to illness, and not to mention are so small; keeping them healthy is the number one priority. Most people understand this, but it is still worth constantly verifying no one sick is coming over to visit.
We required any visitors to have a current TDAP vaccines to decrease the chances of contracting whooping cough, especially in the first six months. According to our doctor, the vaccination takes about two weeks in one’s system before it is effective, so we also asked people to wait for that period before coming over.
We also found it useful to posts a sign or two at the front door, not only to defer people that would wake up the babies (UPS guy/mailman/surveyors) but also to explain our “sickness policy” to folks before they entered the premises. We left those signs up for many months and found it very useful!
Activites!
Finding creative activities to stimulate and keep a toddler’s mind interested is a must. A few things we’ve found along the way that greatly help with sanity.
- Markers – Crayola Mess Free Coloring markers are a must when kiddos are young; the markers only color on special paper. This is a game changer on keeping your house clean while letting them enjoy coloring. It also isn’t a big deal if you lose one, since they won’t mark on anything but that paper. Once they get a big older, the Crayola Pip-Squeak markers are a smaller size and easier to hold, once you graduate to “real” markers (here).
- Water Tables – use your toddler water table for more than just water! That includes bubbles, adding ice into the water for playtime, sand, dirt, snow or even fake snow on those cold, winter days.
- Kinetic Sand – I put off purchasing this for a long time until we actually tried it! The sand is no mess and easy to vacuum up without it getting embedded into all the surface of your home and provides hours of entertainment. We have three plastic bins and each kiddo has their own tools and colors to play with. Try the fancy smelling ones too!
- Magnatiles – one of our personal favorites are Magna-Tiles. We have at least three or four sets now and I’m told they will be used until the kids are upwards of age ten. The girls love to build towers, fill Little People into “houses” or make colorful puzzles. All in all, they can play with these for hours (and it’s pretty fun for the adults too…).
